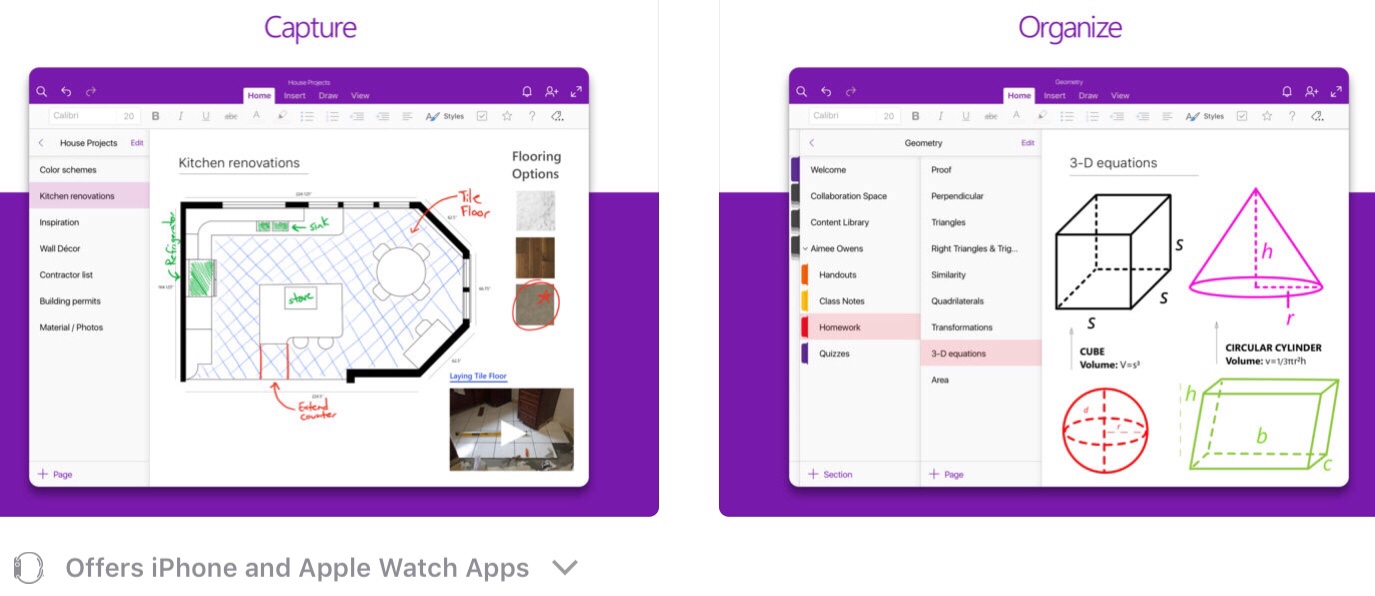
A virtual notebook, with incredible search capabilities, that synchronizes across all your devices and between multiple users in real time. A universal platform, it works on Windows, Mac, iOS, Android, and Online. Everything is stored as a separate element so markups can be removed, files or images can be saved or moved. Pages are a limitless whiteboard that can accept markups, tags, MS Office and 3rd party files, tables, images, video, audio, web elements and screen clippings. You can also print to OneNote from any file.
Navigate
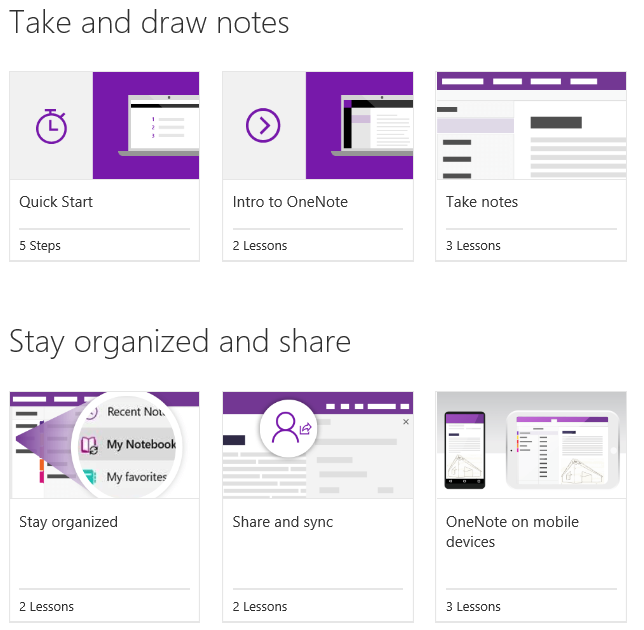
Compare the interfaces on various platforms here
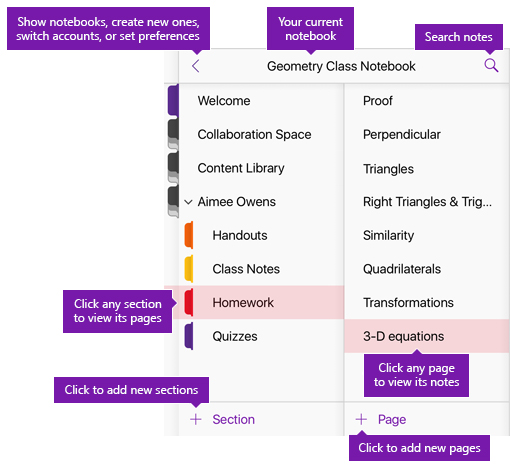
- Notebooks in OneNote never runs out of space. Add more pages or sections to any notebook and create new notebooks to separate projects or limit who has access to content.
- OneNote opens in the last notebook you worked in on each device.
- Open a different notebook from File open or the show more arrow “<” on iOS.
- OneNote lets you stay signed in with multiple
- personal
- , work, or school accounts and navigate between their notebooks with ease.
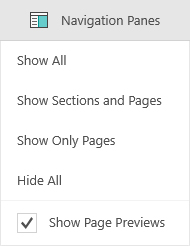
- Resize the panes – Move the mouse pointer over the vertical edge of any navigation pane
- Full Screen mode – Enter by clicking the diagonal double arrow icon in the upper right of the page
![]()
- Nest pages by right clicking the page tab and choosing Make Subpage to keep the organized
- Pages and sections can be renamed moved or color coded by right clicking the name.
- Screen grabs from windows – Press Windows Key + Shift + S then select the area to capture
- Hold text, pictures, audio and video clips, handwriting, and screen clippings.
- You can change their size and dimensions, move them around on a page, and merge their contents.
- Create a container on a page by double clicking anywhere on a page and start to type .
- Each is independent and will not be moved by edits in another.
- Appear on a page whenever you mouse over them.
- Used to place text anywhere in relation to an image
- Sizing handle
- Move handle
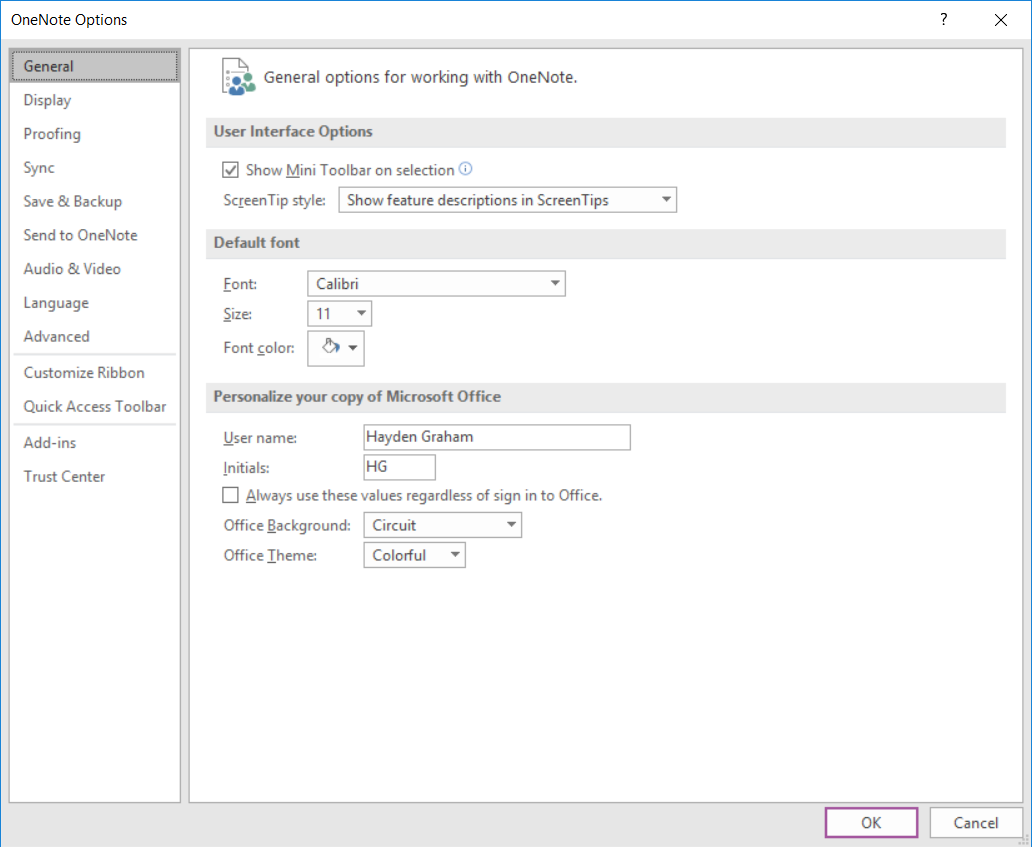
Customize your overall OneNote experience by choosing your preferences for certain app-wide settings.
- On a PC, click the File > Options
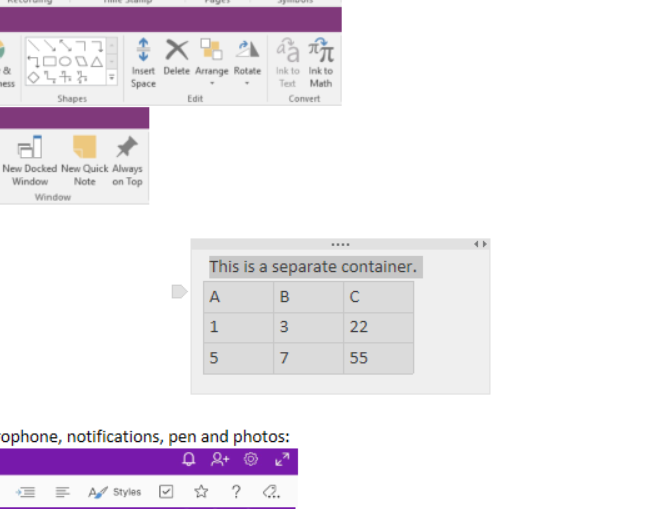
- To see more of your notes while working on a tablet hide parts of the interface that you don’t need.
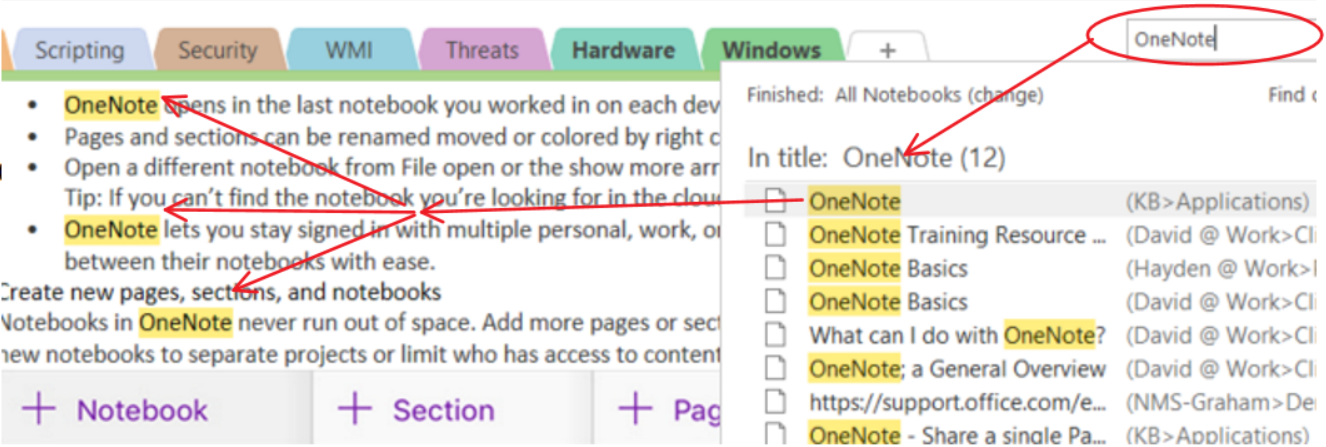
It’s ability to instantly search is amazing!
- The scope can be limited to All Notebooks, Current Notebook, Section, or Page.
- Text within images is searchable
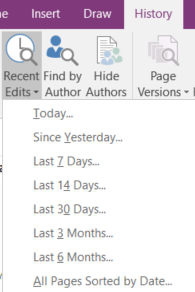
- You can search by Author or Time:
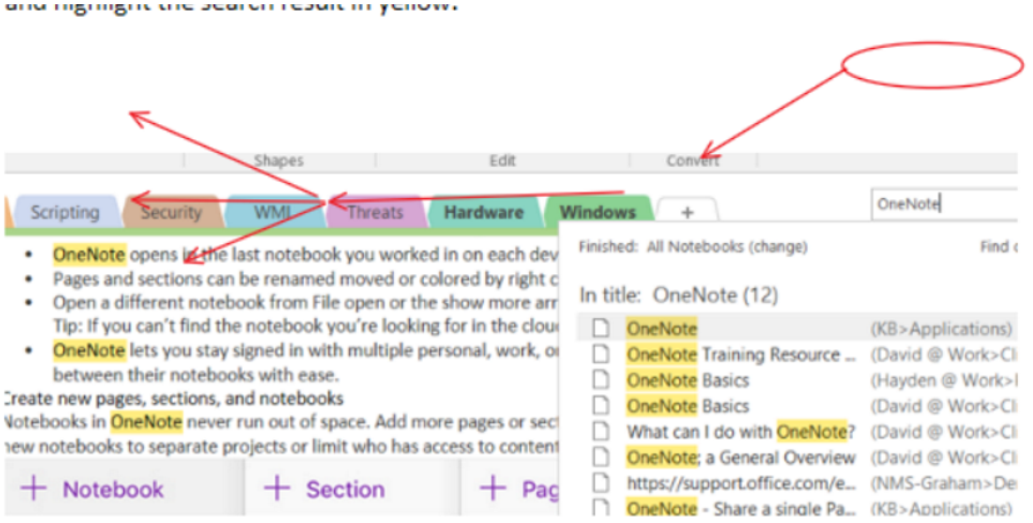
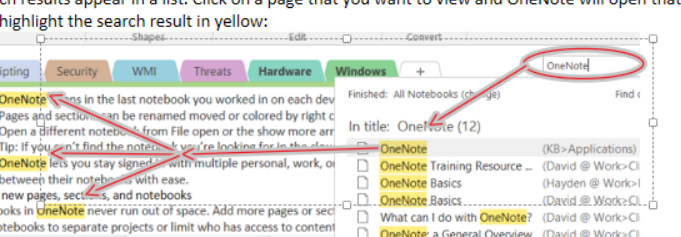
- Search results appear in a list. Click on a page that you want to view and OneNote will open that page and highlight the search result in yellow:
- Shared Notebooks are access by multiple users simultaneously.
- Changes are automatically saved in real time and synced to all users and devices with OneNote open.
- Cloud vs Network – Notebooks can be placed in the cloud (OneDrive) to allow access on a iOS device/Browser or can be stored locally on a network share to ensure the contents are private.
- Sections can be locked with a password
- Pages can be moved or copied between notebooks or sections.
- Security is maintained on a notebook level. Therefore a notebook should be placed in an appropriate location. e.g. accounting notebook is saved on the accounting share.
- In the cloud notebooks can be shared with read only or read/write to individuals on your team
- Tip: OneDrive is the cloud storage for OneNote notebooks. The person in charge of security for a notebook should be the one to create the notebook this will allow them to adjust user access in the future.
- Tip: If you can’t find the notebook you’re looking for in the cloud? Make sure you’ve signed in.
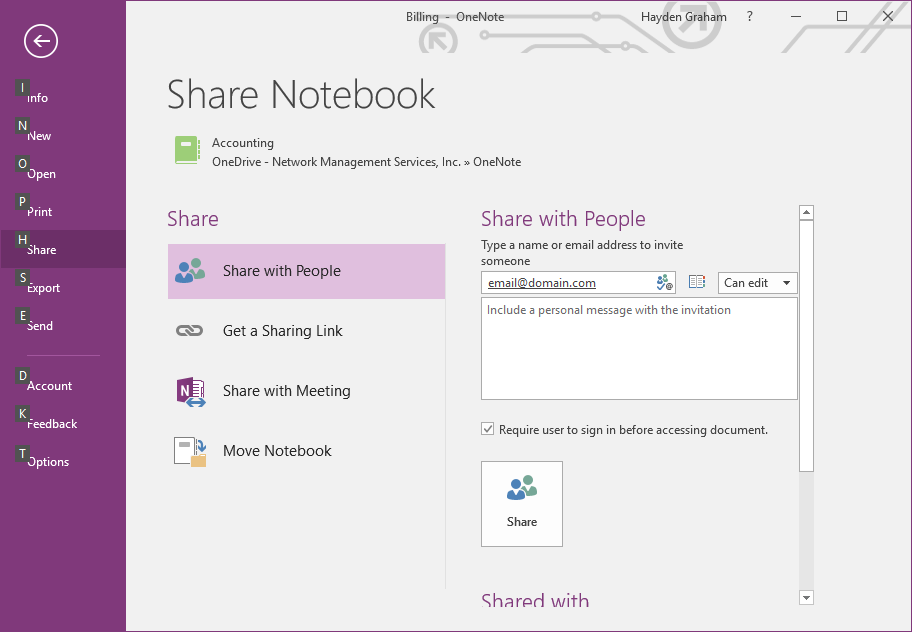
To Share a Cloud based notebook:
From your PC: Right click the name of the notebook > Share This Notebook:
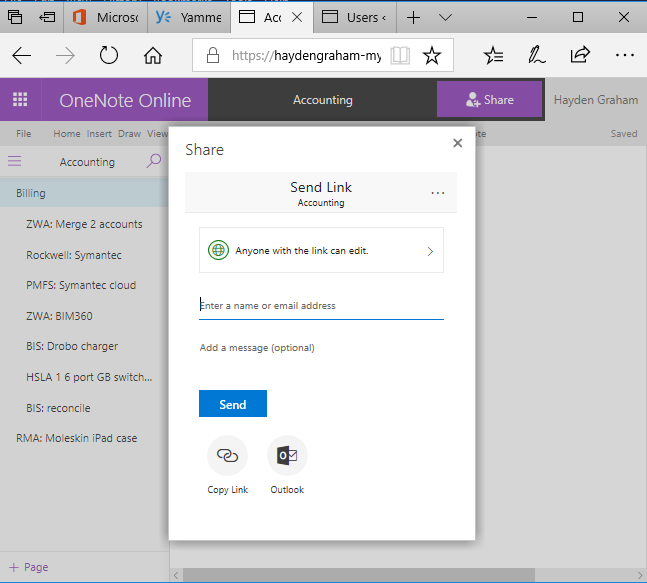
From Office.com: Click Sharing at the top right and send an invite:
- To create an instant table type the first column header > press Tab > enter your next header > press Tab etc.
- At the end of the first row press Return and a new row will appear tab through to add data
- To insert a row in an existing table – place you curser at the beginning of any row and press enter
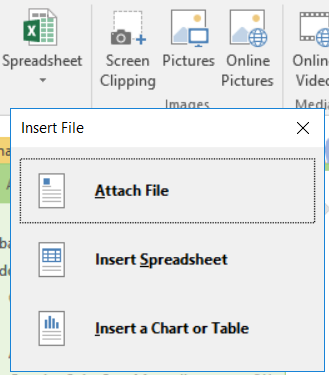
- Excel Sheets can be added from Insert > Spreadsheet
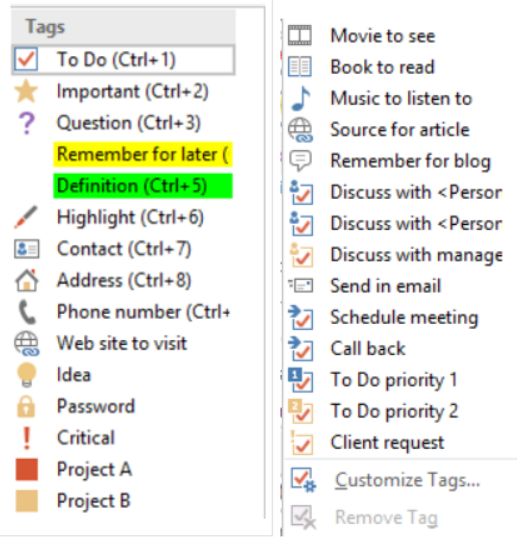
- All content is date and user stamped for enhanced search, in addition users can add these tags:
- While deleted pages can be recovered, edits are permanent and saved in real time. If you make a mistake use the undo arrow or press Ctrl + Z.
- Never move or rename or move a shared notebook as all devices and users will no longer have access
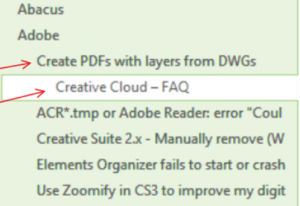
- Markups float above other elements such as images and text. If you are editing a section of a page above a markup these element will be pushed out of alignment. As you see below the red markups are no longer aligned with the image.
- To fix this got to Draw > Lasso Select > circle markup elements and realign them.
- Alternatively, you can create a separate note container. These do not move when edita are made in another container:
Click here to access the videos on the page pictured below: